Tutorial a special party baby bib
Classy baby in all circumstances :-D I wanted to start making original “special party” bibs! For him: a bow tie bib / For her: a Peter Pan collar bib. Here is the tutorial:

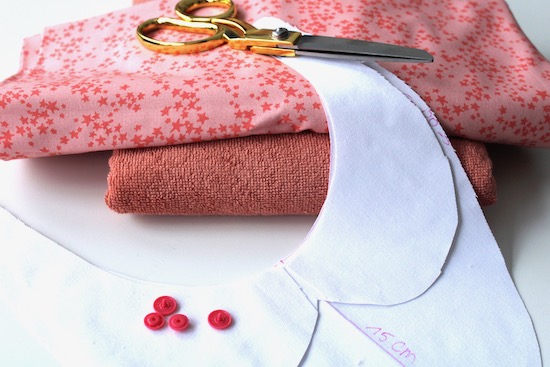
Material
- 30cmX30cm terry cloth fabric
You can choose for 100%cotton or the Bambou viscose. I prefer the last one because it's softer.!
- 30cmX30cm of printed cotton
- 30cmX30cm of iron-on viseline H200
- snap buttons
- thread, scissors, pins
- The sewing pattern download here >
Step 1 : Cut the pieces
For her :
Print the template :
- the body of the bib : cut 1 X in the terry cloth fabric and 1x in the cotton
- the Peter pan collar : cut 2 x in the cotton and 1 x in the iron-on viseline
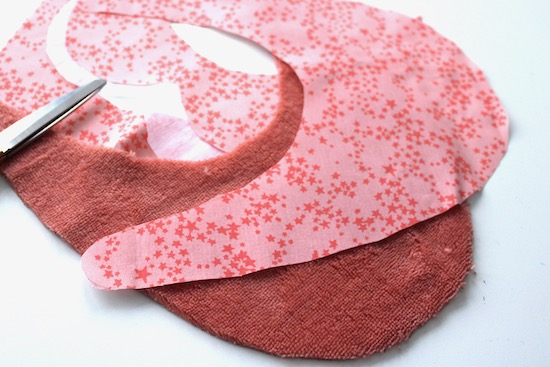
For him :
Print the template :
- the body of the bib : cut 1 X in the terry cloth fabric and 1x in the cotton
- for the bow tie : cut a rectangle of 29,6cmX12,8cm and another of 7,2cmX5,6cm in the cotton

Step 2 : the bib
For her / For him :
Take the cotton + terry cloth pieces from the bib and pin them right sides together. Sew a seam all around but leave a space of 5cm (to turn the work over). Notch the rounded edges before turning the bib over for a better result.

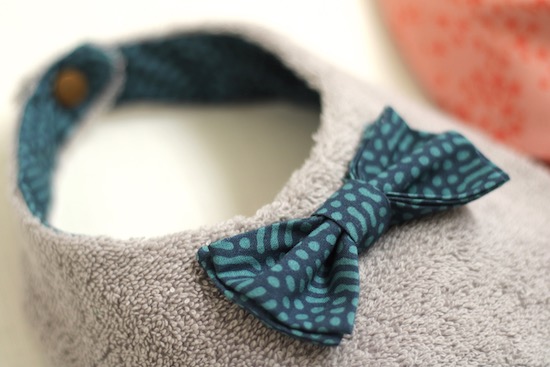
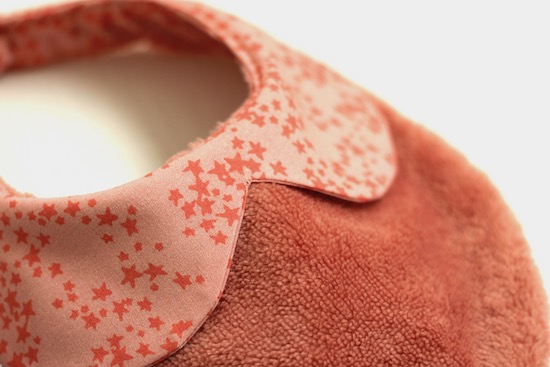
Step 3 : the «party» accessory !
For her :
Start by puting the iron-on viseline at the wrong side of the collar. Then pin the two sides right sides together and sew a seam, leaving 5cm open to turn it over.


Next, put the collar on the bib and sew a seam only on the top (round part). All you have to do is fix the 2 snaps and Little Miss's bib is ready!

For him :

Les Tissus du Chien Vert - 12/14/2023 10:02:00
@ Laurence, Non attention : le tuto du noeud papillon sur notre blog : https://www.chienvert.com/fr/blog/le-noeud-papillon-n38 est un modèle pour adulte. Donc pour le bavoir il faut adapter les mesures, testez en divisant par 1,5 voire 2 les pièces A & B :-) Bonne couture !
Laurence - 12/13/2023 09:54:39
Bonsoir Léa, Très chouette idée ! Pourriez-vous juste me confirmer que pour un bavoir bébé on utilise les mêmes mesures pour le noeud papillon que dans votre tuto "noeud papillon" dont vous nous mettez le lien ? Le noeud me parait immense pour un bébé. Merci d'avance pour votre réponse
Les Tissus du Chien Vert - 12/10/2023 09:56:31
Bonjour Lisa, non ce n'est pas nécessaire car nous avons juste thermocoller le col claudine (non présent sur la version garçon)
Lisa - 12/05/2023 13:35:46
Bonjour. On ne met pas de Thermocollant pour le bavoir pour lui?
Lyse - 09/17/2023 12:48:46
Super!!!! J'ai adorée