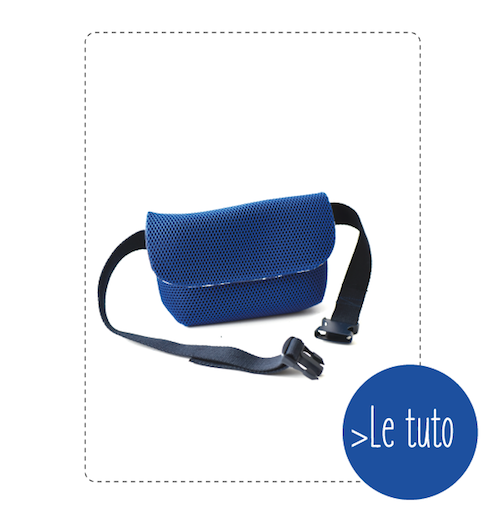
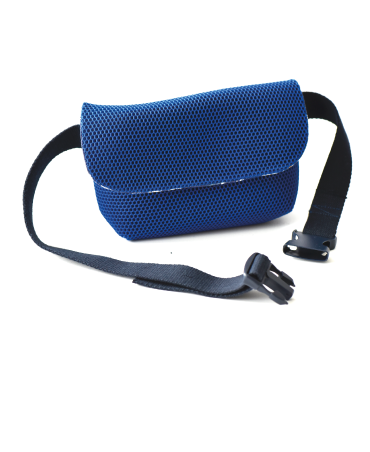
DIY - the fanny pack
The fanny pack is coming back and is becoming an essential fashion accessory for going outdoor. Practical thanks to its belt worn around the waist or over the shoulder. Walk around with your hands free! Let's get started?
Material:
To make a fanny pack with the following measurements 20cm high / 17cm wide / 6cm deep:
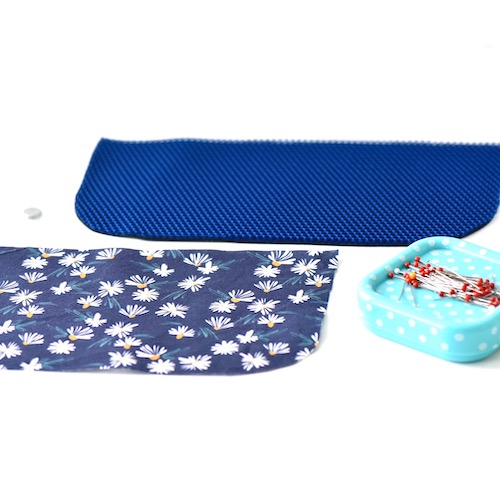
- a thick fabric cloth of 25x75cm for the exterior
You can choose for coated cotton, upholstery cotton or even a faux leather.
- a fabric cloth of 25x75cm for the lining
I chose a cotton with coordinated blue pattern of the collection By Léa >
- 110cm strap with a 4cm width
- the pattern to download here >
The seam allowances are included.
Step 1: Cut the shapes
Print the pattern and transfer the shapes to your fabrics. Get 1x each shape (flap, front side and back side) in the fabric for the exterior and for the lining.
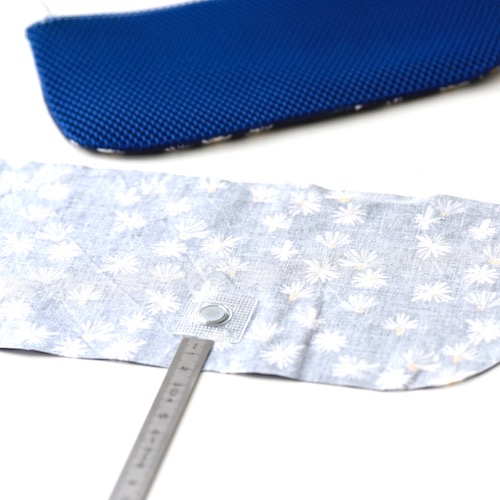
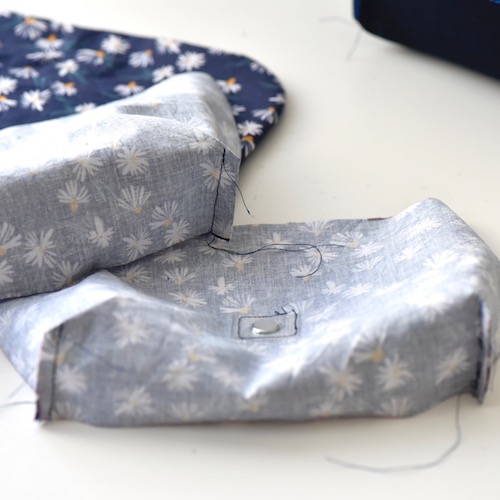
Step 2: Making the flap
Place the magnet in the center of the lining at 2cm from the rounded edge. If you find your lining too light add a little reinforcement.
Superimpose the thick fabric and lining right sides together and sew the rounded circumference at 1 cm from the edge. Leave the right part open. Cut again at 0.5cm from the edge so that it is not too thick when you turn in over.
Turn the piece over and mark the curves with an iron. Warning: if it is faux leather, place a fabric between your iron and the faux leather to prevent it from melting ...
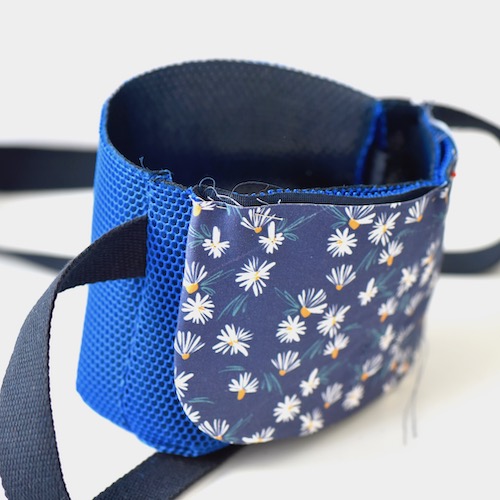
Step 3: the gusset and straps
Take the front / back side for the exterior and sew the gussets.
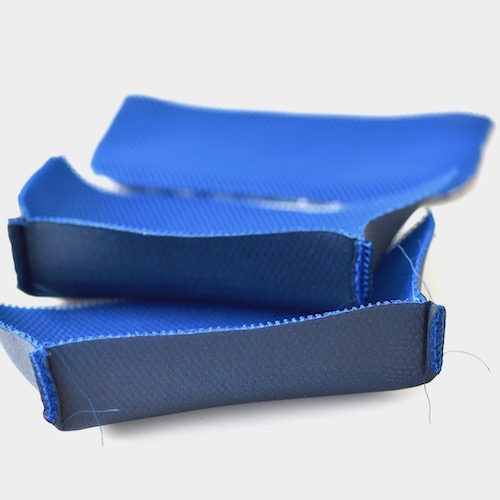
Then superimpose the sides right sides together and sew, leaving the notches free to be able to pass the straps.
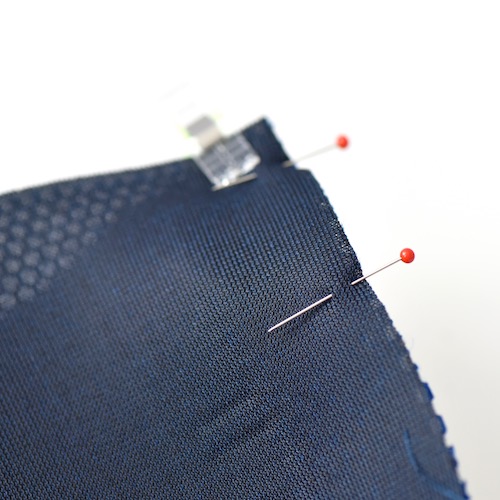
Place the straps as in the diagram with a piece of 20cm on one side and the rest on the other. Then sew to secure the straps.

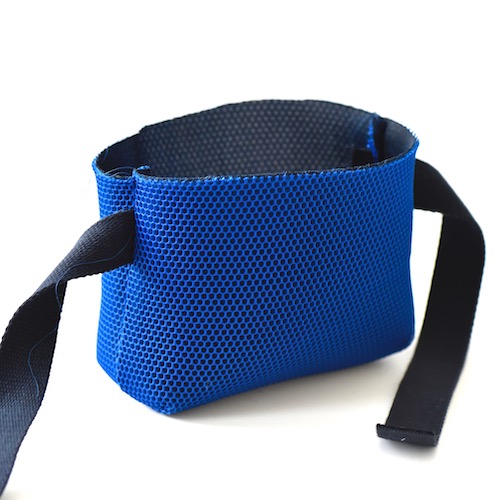
Turn it over. You have now :
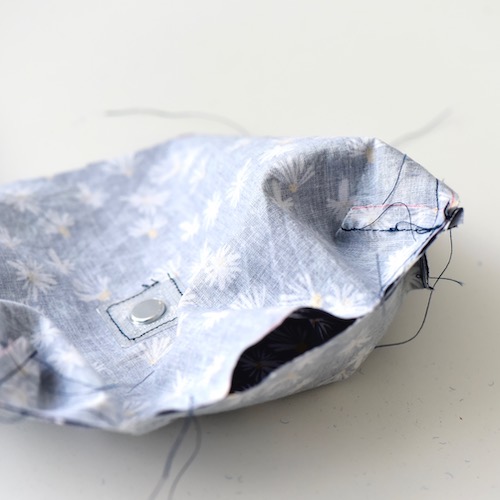
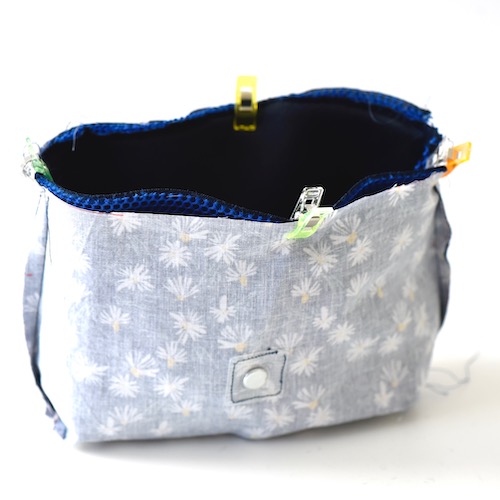
Step 4: assemble the lining
Take the front side of the lining and sew the magnet on the wrong side in the center at 7 cm from the top edge.
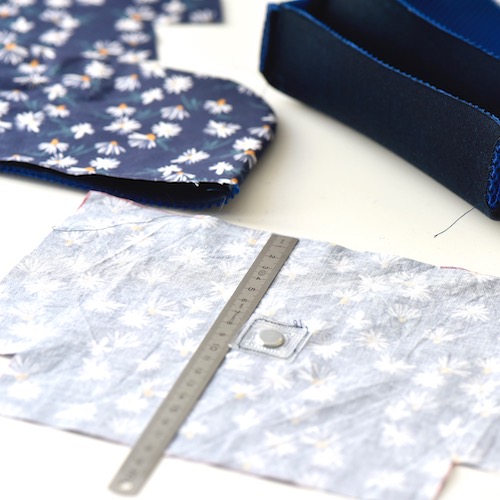
Overlap the front / back sides, right sides together and sew, leaving a 10cm opening at the bottom. Turn it over and close it.
Step 5: place the flap
Place the flap right sides together with the back part of the bag like this:
Fold the straps back and sew at 2cm to secure everything.

Step 6: Lining the bag
Tuck the exterior part into the lining right sides together, adjust the side seams and pin it. Sew the circumference.
All you have to do is place the anti-slip buckles on the strap and hold them with a seam. Your fanny pack is ready!
See you soon,
L.
colin maryline - 01/15/2023 11:36:00
je viens de découvrir les tutos j'adore j'adore
Van den Hove Anne-Marie - 01/13/2023 18:59:11
Je vais tester ce sac !