DIY - Dry feet carpet / bag
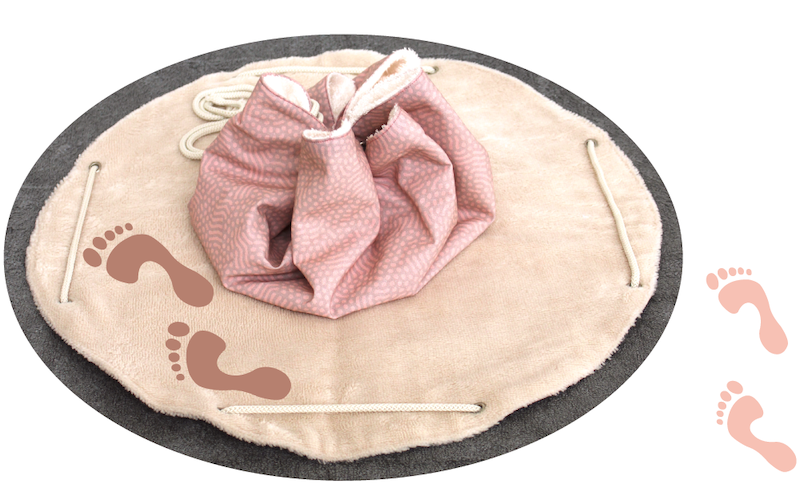
Go for a swim while avoiding germs and inconvenience in the cubicle thanks to the dry feet mat for the pool. Practical and useful because once closed it converts into a small waterproof shoulder bag containing your wet things! Adapt the dimensions if necessary to sew your kids' dry feet carpet bags ;-) Here is the tutorial ...
Material to make your Dry feet mat
With these measurements I have sown a mat for my daughter with a diameter of 55cm once unfolded :
- 60cm coated cotton
you will find your happiness here or you can also choose a simple printed cotton to coat yourself with the waterproof coating "odicoat".
- 60cm bambou terry cloth fabric
I used a bambou viscose fabric thin and flexible ☺
choose the once with a diameter of minimum 5mm according to the thickness of your cord
Making the dry feet bag
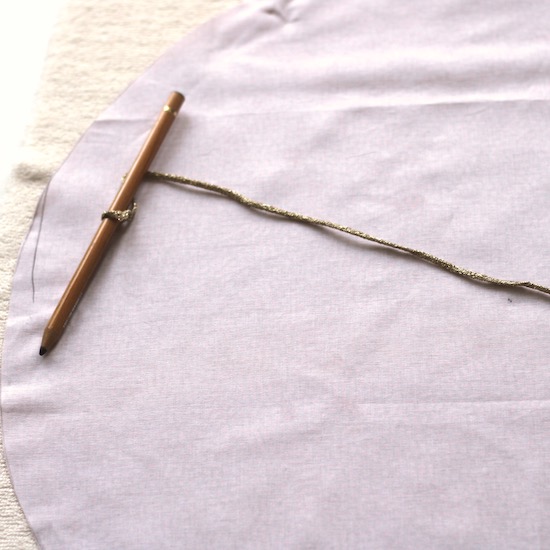
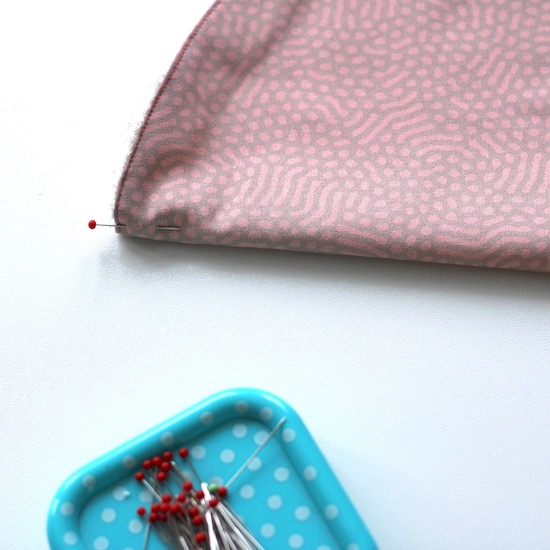
Step 1 : preparing the 2 circles
No need for a compass, just a pencil and a piece of string: place the cotton face down towards you and tie the string around your pencil. Take a distance of 27.5cm and draw the circle on the fabric.
Cut out the circle and then place it right sides together on the bamboo viscose. Pin them together and cut out all around. You now have your two circles.

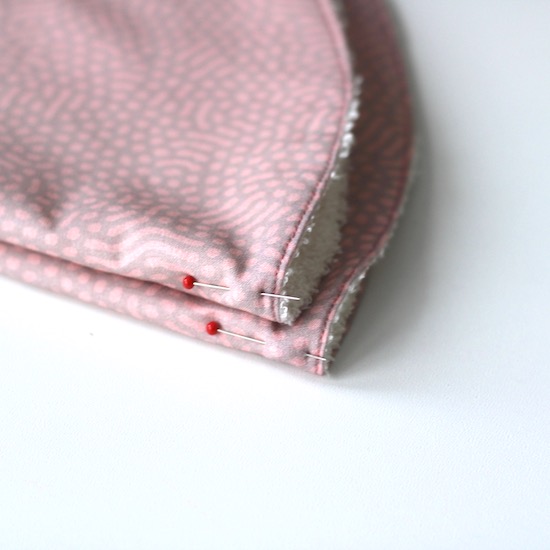
Step 2 : assemble the circles
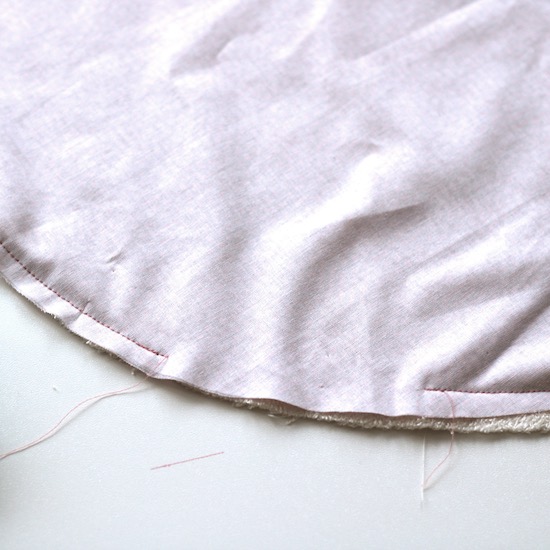
Superimpose the circles right sides together and stitch the circumference at 1cm from the edge, leaving an opening of 10cm to turn it over.
Once turned, iron by flattening the seams well so that the work is nice and round. Make a new seam 3mm from the edge while closing the opening.

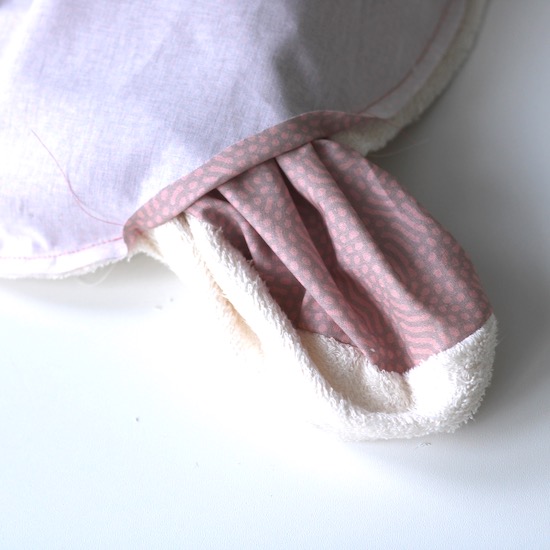
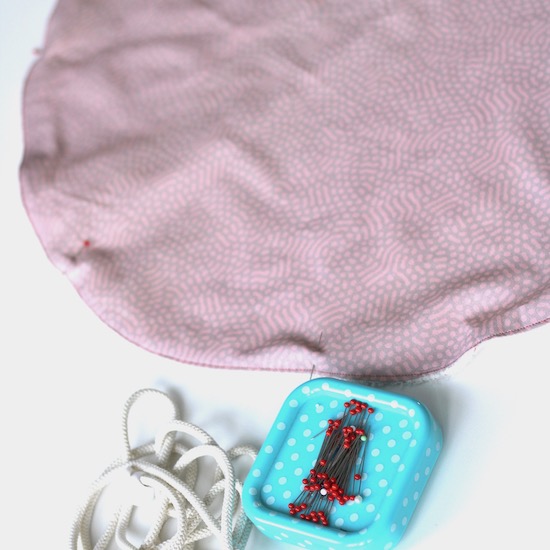
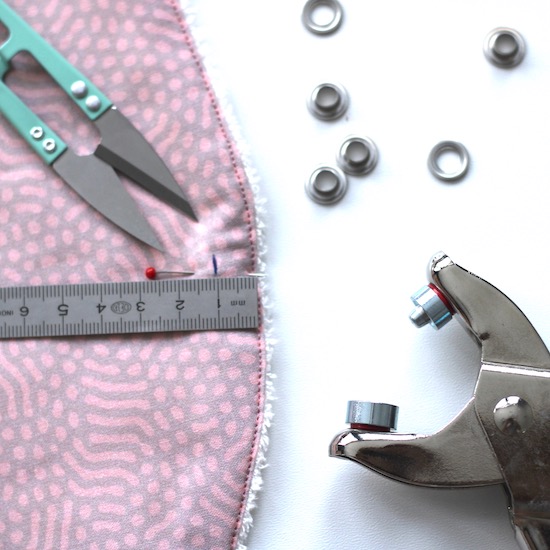
Step 3 : the rivets
Fold the disc in half on the terry cloth side and pin on each side of the fold: you get the first marks for the rivets.
Fold in half again and do the same step: you now have 4 marks.
You only have to mark the middle of each of these marks in order to prepare the placement of 8 rivets.
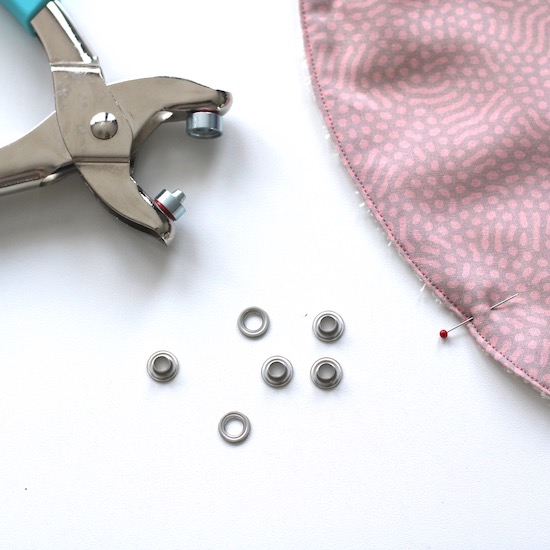
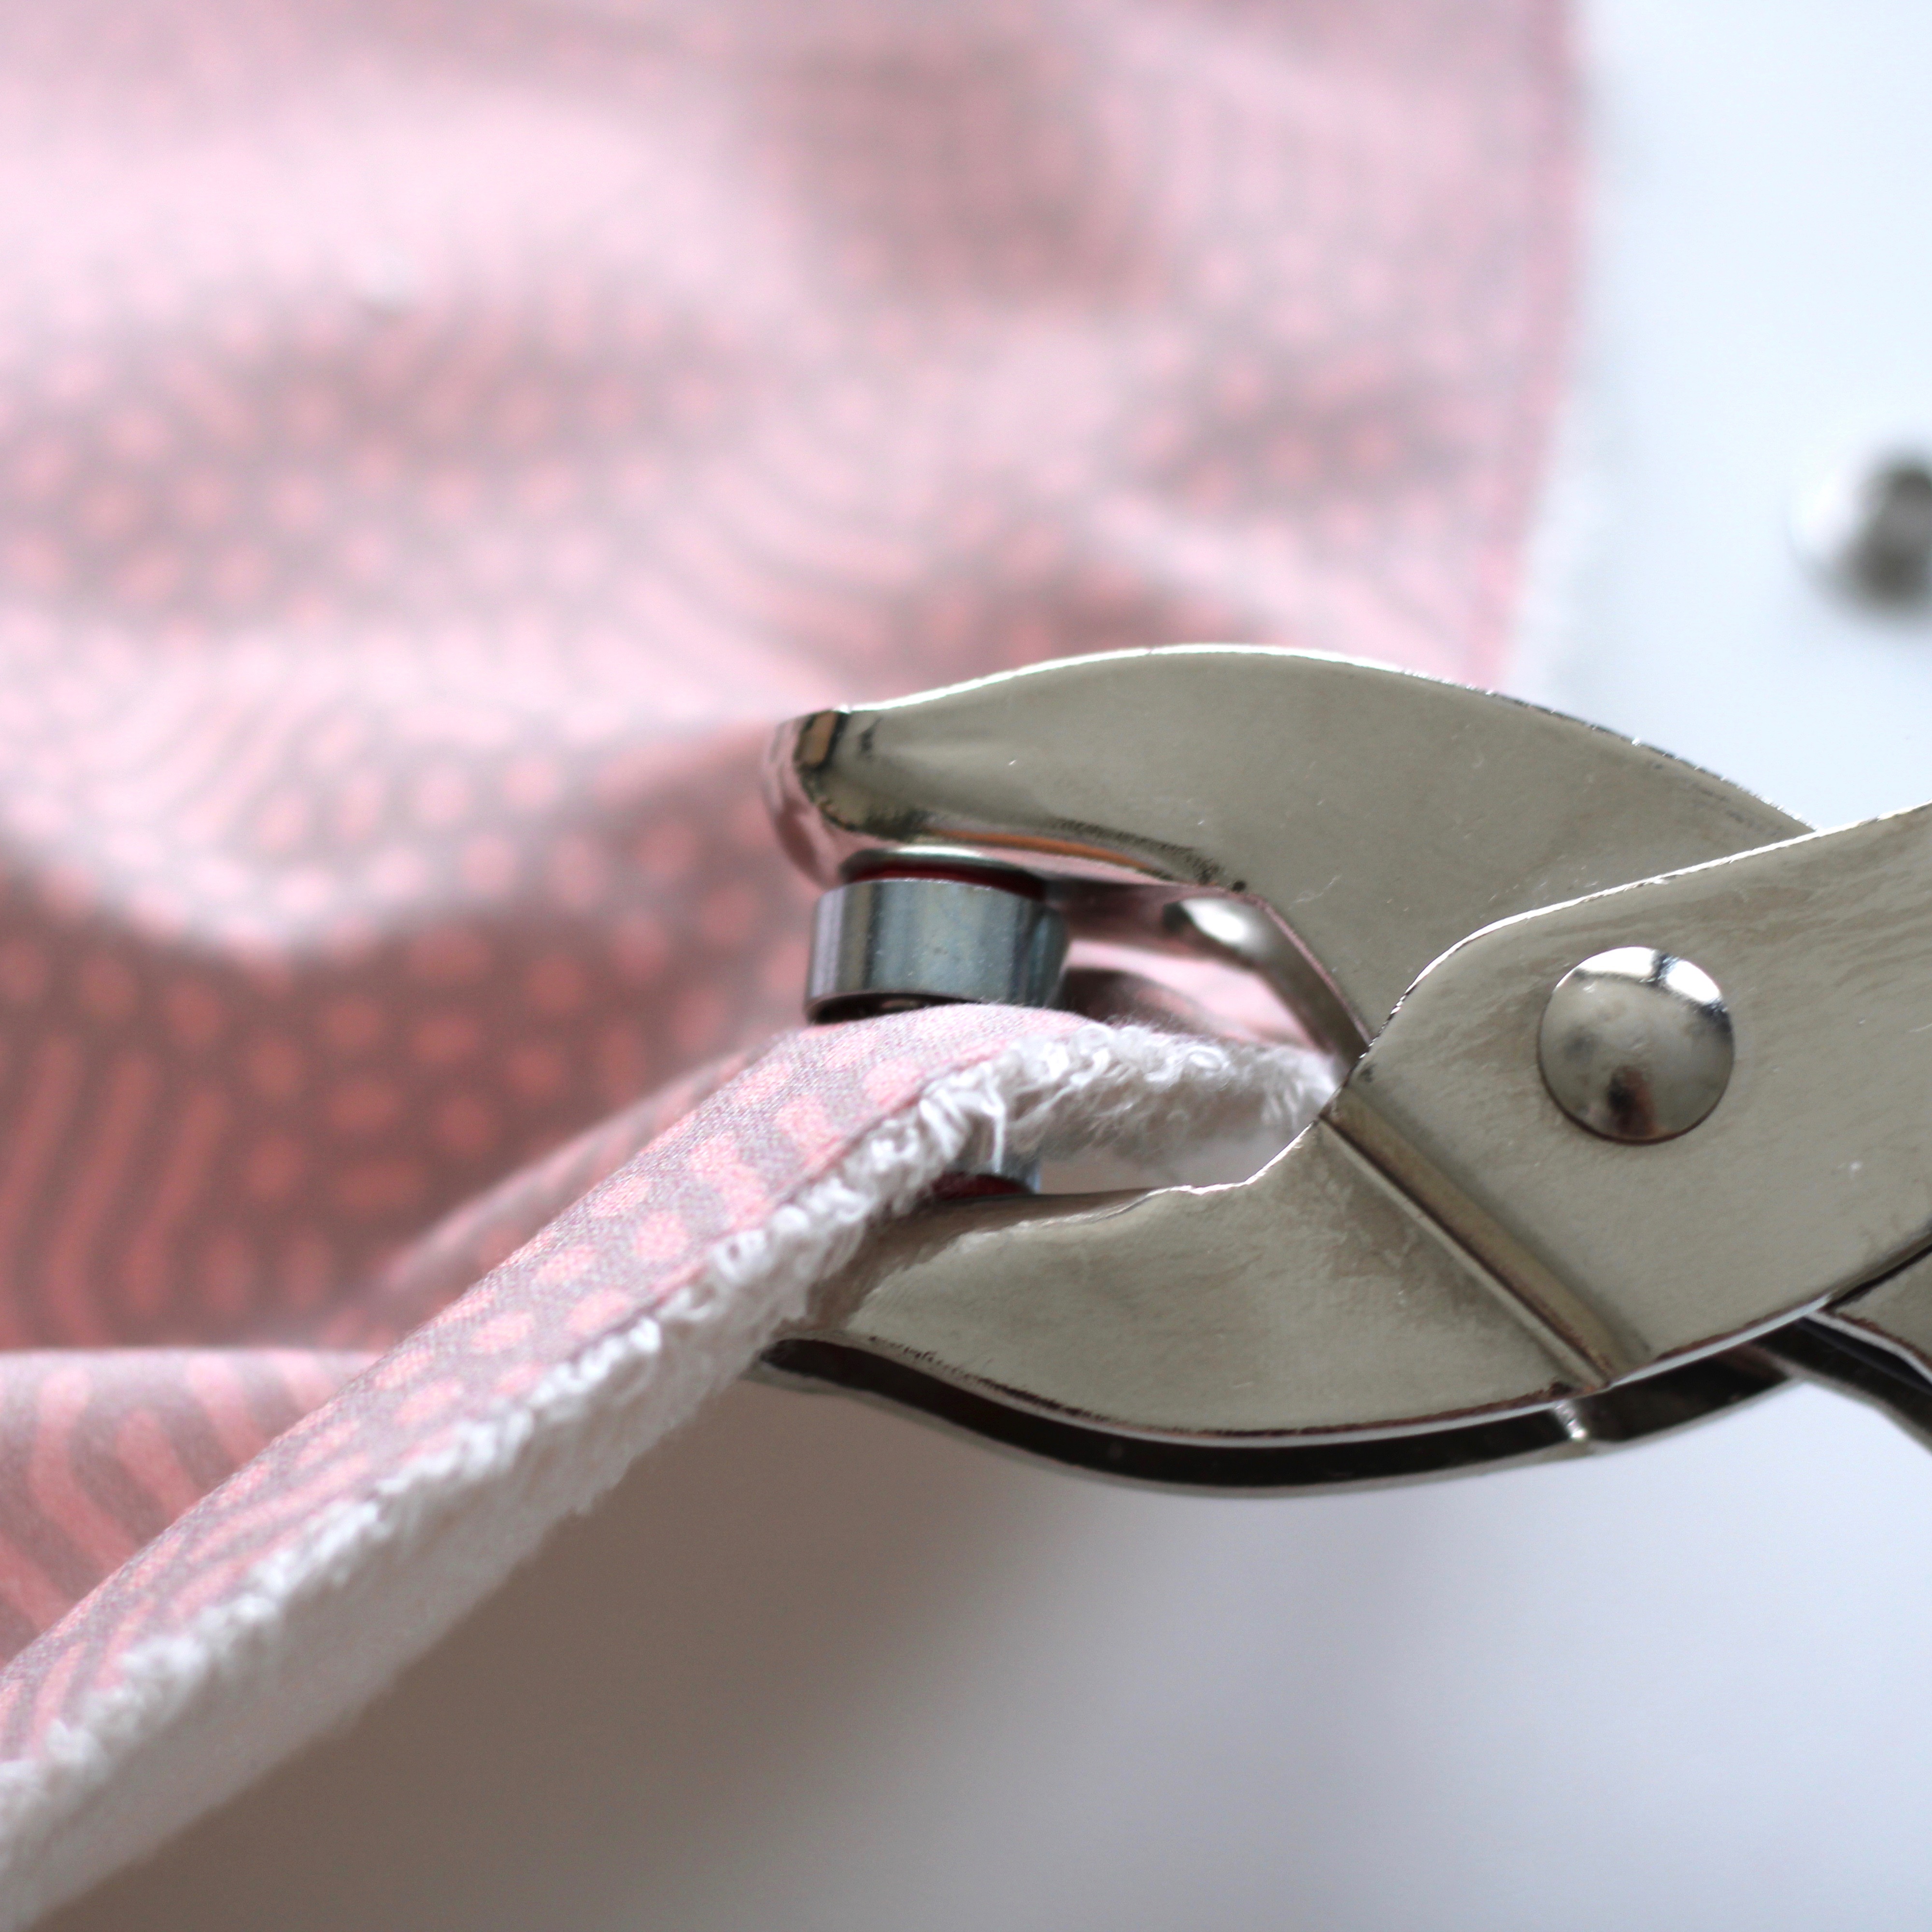
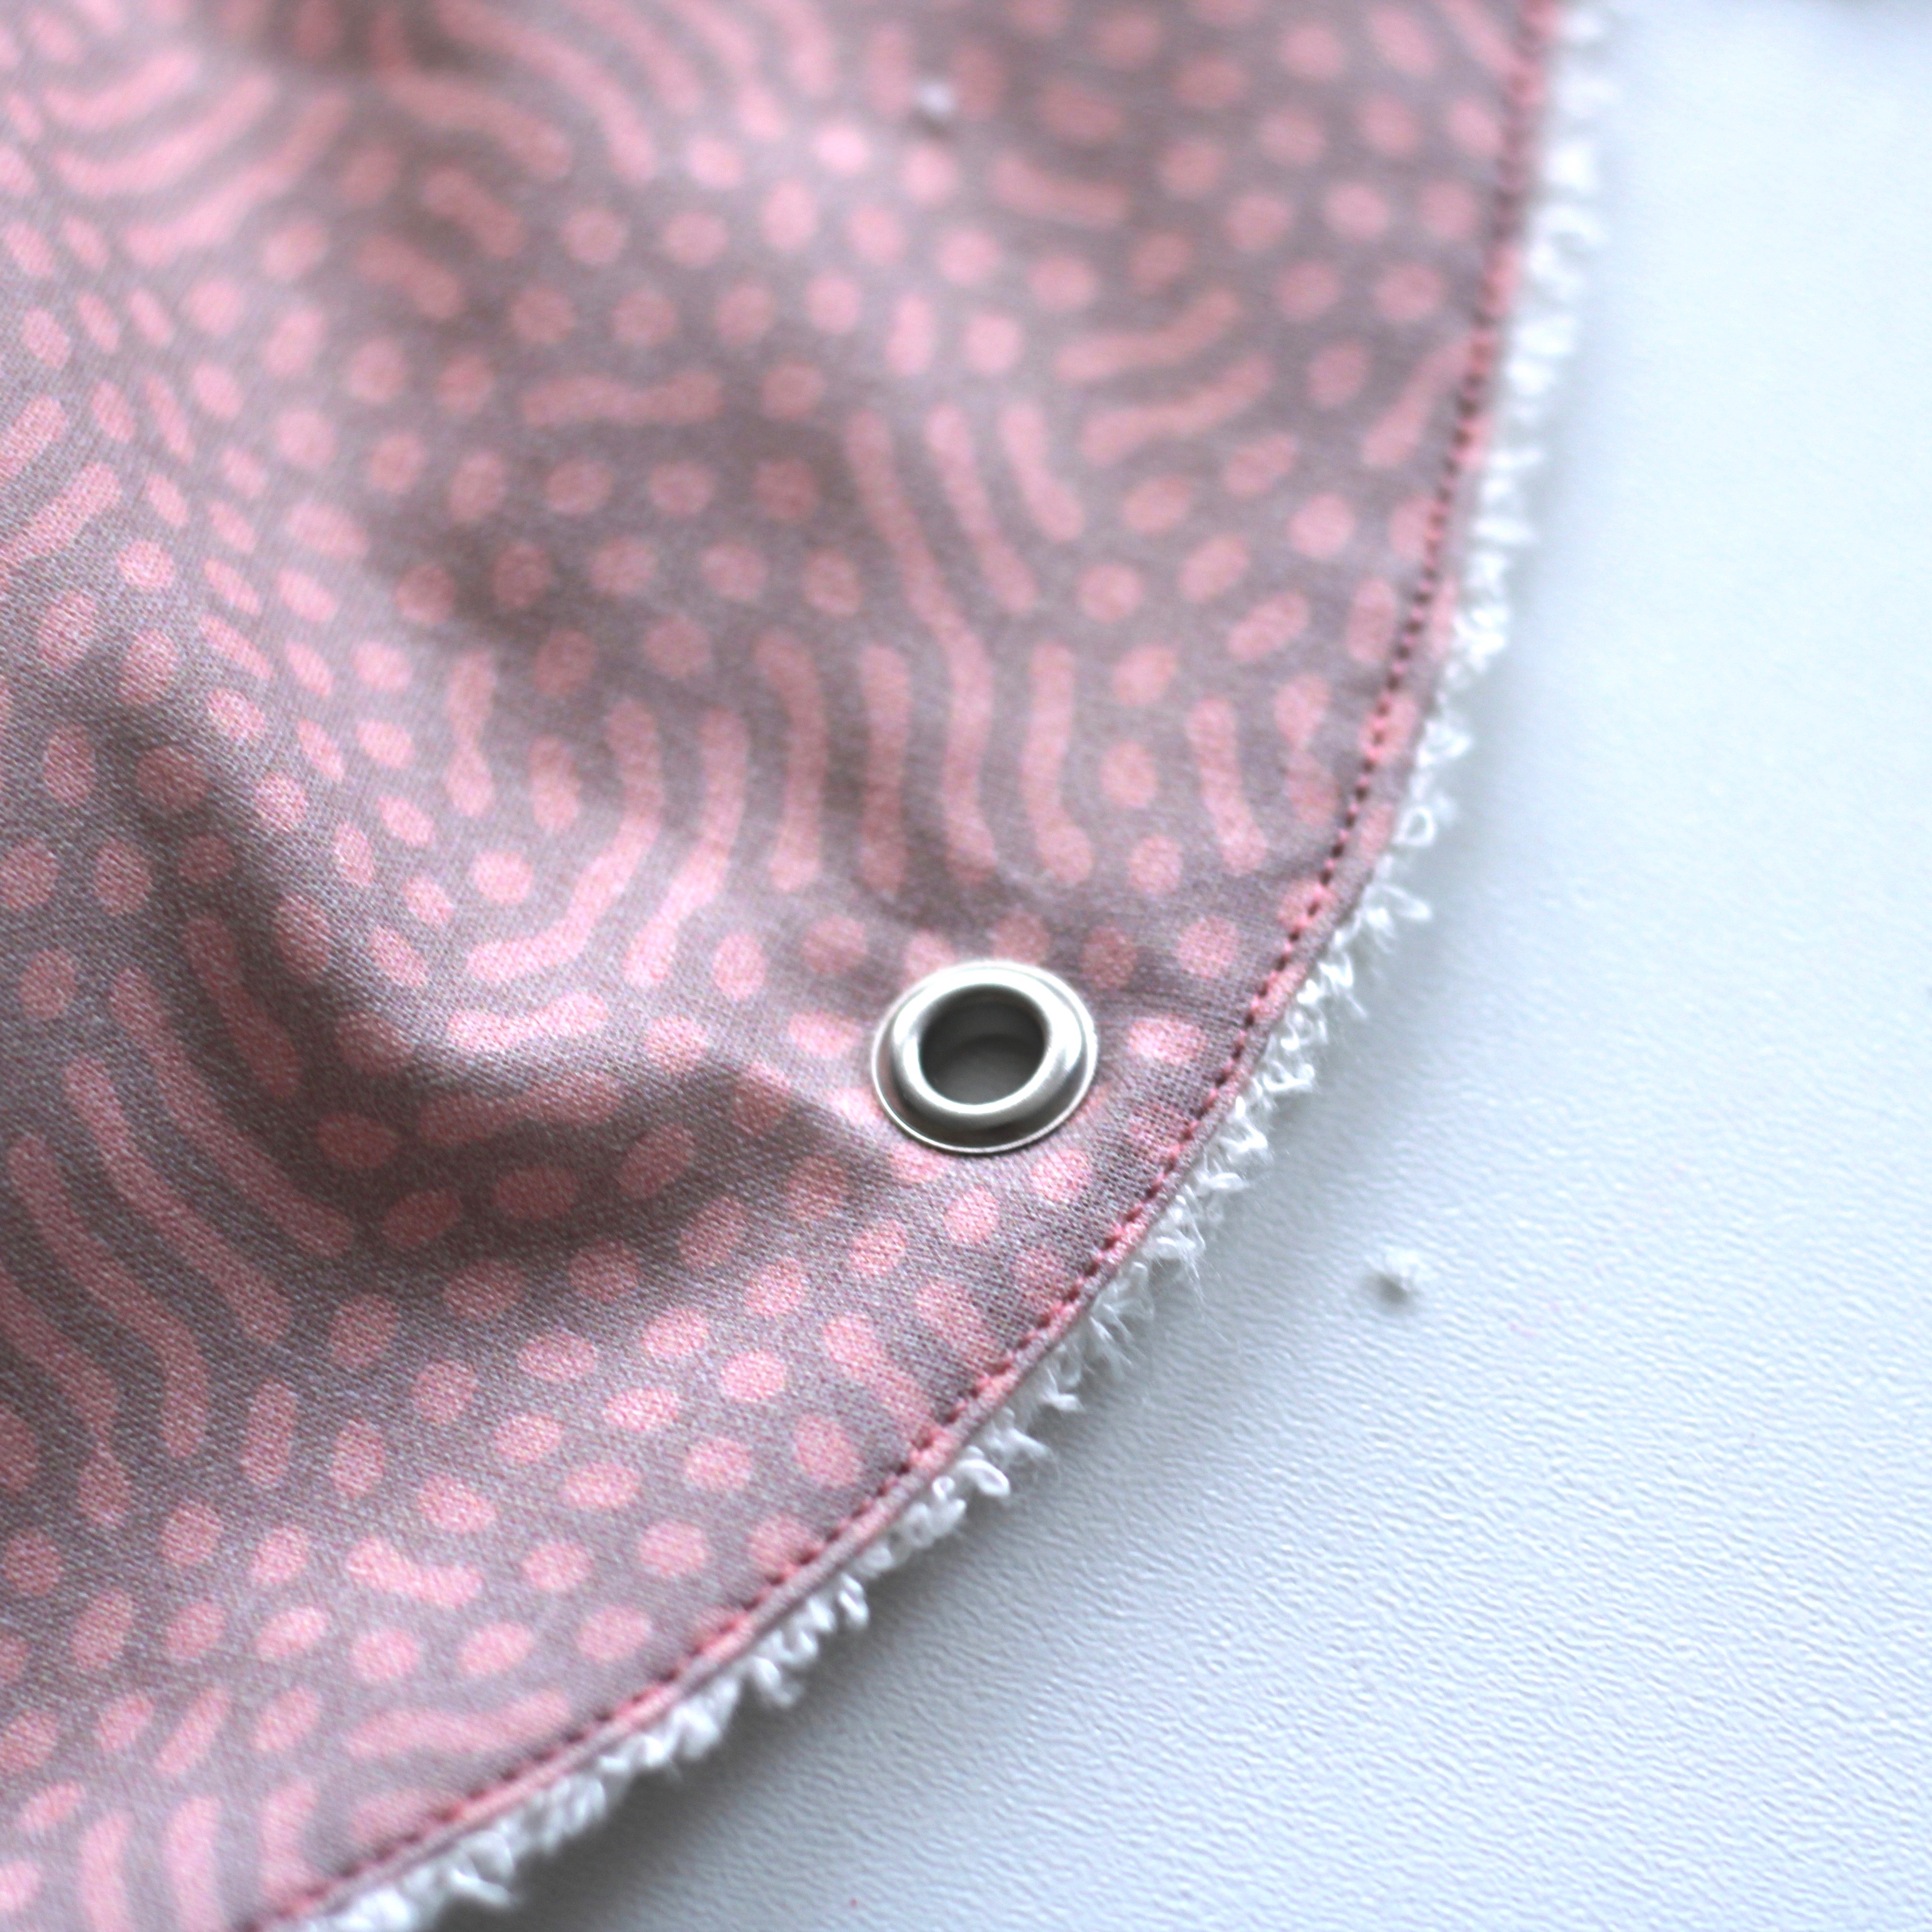
Put your marks 1cm from the edge and make a small hole using a thread cutter to be able to insert the bottom part of the rivet. Here are some pictures to help you :
Then take the cord and pass it through the rivets. Either by making a knot or by using a cord lock as for sweatshirts.
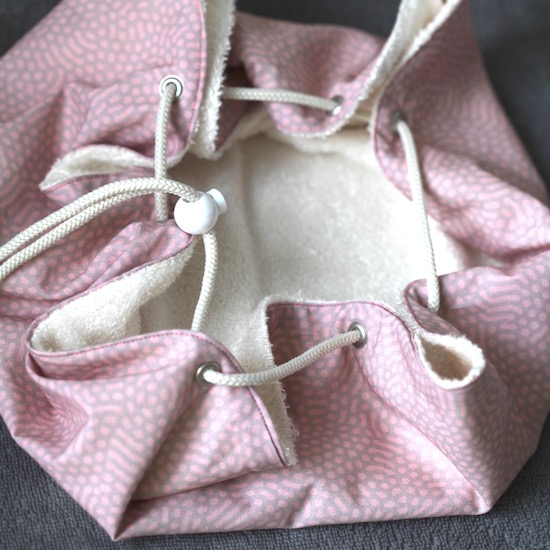
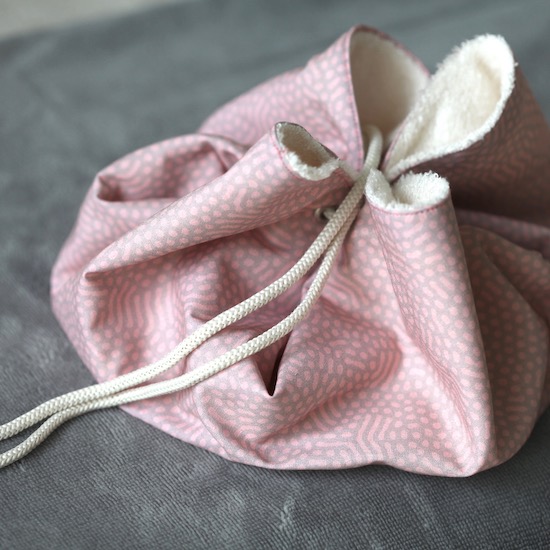
Your dry feet mat for the pool is finished ! Put your swimsuit inside before closing it and you have a waterproof pouch for after the swimming lesson. Practical right ?
See you soon, L.
Carole Lesueur - 04/03/2022 21:41:25
Super idée !! Je l’adopte