DIY the Kimono blouse
It is the new essential item for your wardrobe: the kimono! In addition to being pleasant to wear, this type of loose blouse has the advantage of being "all-purpose". By varying the styles, you can wear it to the office, on a shopping trip or even for a classy evening !
The kimono : How do you wear it ?
Any occasion is good to put on your kimono blouse! The trick is to combine it with other pieces in your wardrobe to vary the styles. Another advantage: it suits all body types.
My kimono in the city
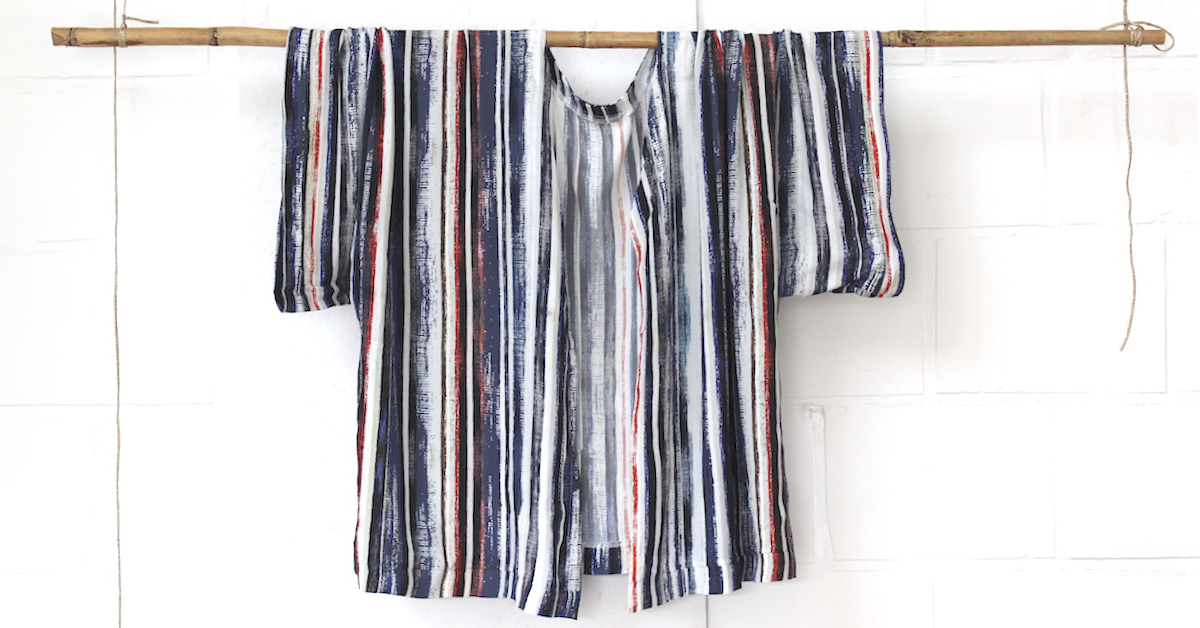
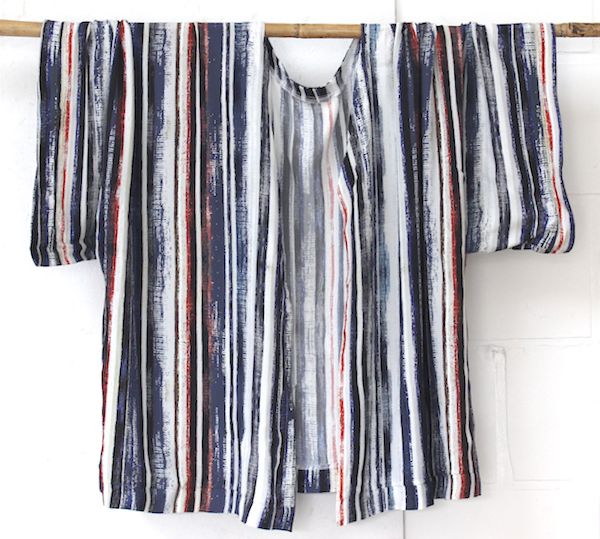
Let's go for a casual look by combining your loose blouse with slim fit jeans or denim shorts. Go wild with patterns and colors! I used a colorful viscose striped fabric for my "West" kimono (tutorial is below) to create my city style.
My kimono at the beach
And yes, take your kimono in your suitcase too. As an alternative to a sarong, it can be worn over your bathing suit when you get out of the water. Choose a "flashy" color, it's summer after all!
My kimono at the office
Just to forget the usual blazer from time to time... Make your kimono blouse in a solid color this time. And match it with a more severe pants or a straight skirt.
My kimono at evening
For a relaxed but stylish classy look. I recommend choosing a solid color that will create a contrast with the color of your dress or mid-length skirt.
The kimono blouse «West»: the tutorial
Materiel
- 1,5 m. fluid fabric
Viscose is perfect to make this type of blouse. It has the advantage of being fluid and breathable. It's better if you choose a fabric with a width of 150cm.
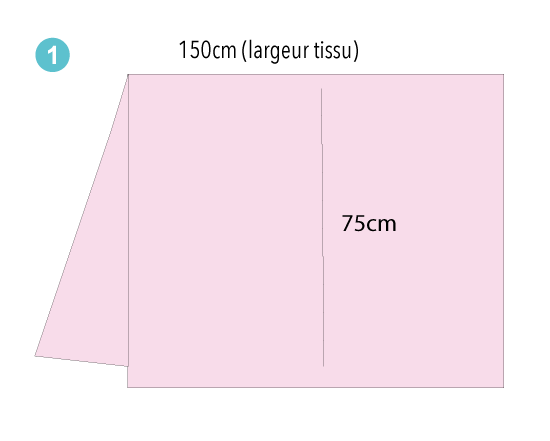
Step 1-2: fold and cut
Cut a square to the width. Here I have a coupon of 150x150cm. Fold your fabric in half lengthwise right sides together.
Then cut out the sleeves and neckline like this:
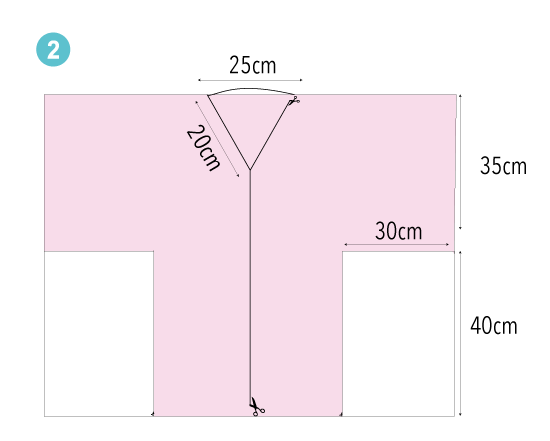
*Attention: for the neckline be sure to cut only on one side of your folded fabric.
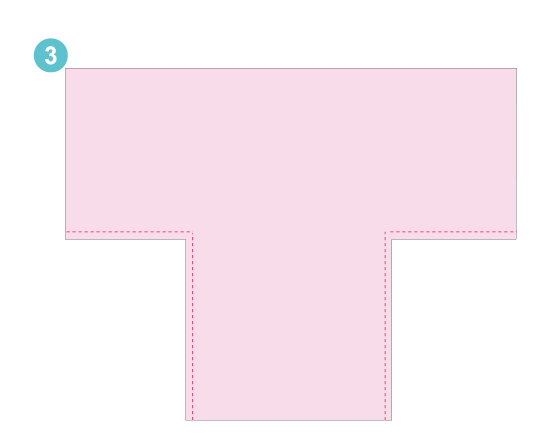
Step 3: side seams
Sew the sides and armholes.
Step 4: the neckline
Turn the work over and hem the sleeves.
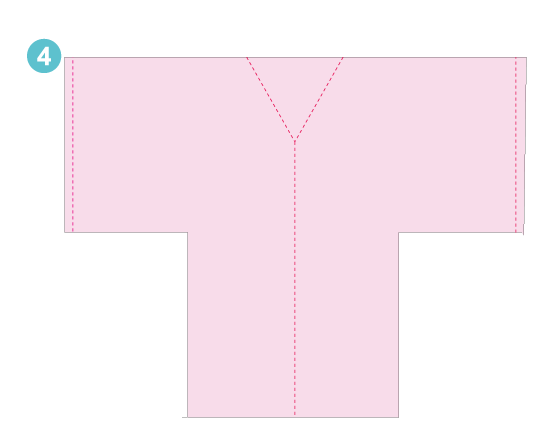
For the neckline, I made a facing to have a nicer finish with more body. But if you don't have time, you can hem it directly ;-)
Step 5: finishing touch of the bottom
All that's left is to hem the bottom of your blouse. Your kimono is ready !
See you soon,
L.
Manon - 05/16/2022 11:38:49
J'adore ce style de tissu ! J'utilise du tissu au metre pour mes créations, ce qui me permet de choisir le tissu de mon choix pour tester mes vêtements. C'est très intéressant merci !
Passalis Chantal - 05/08/2022 19:29:34
Super pour le Kimono...